Welcome to your BackOffice - the place you run your entire website from. This short tour shows you how to find your way around and make your first changes.
Start with the guided setup
If you are just starting, don't browse the menu at random - open the guided setup. It walks you through the essentials (business details, logo, colours and styling) with a live preview of your site beside it: every change shows up instantly, before you save it.
The setup writes straight to your real site, so you can leave and come back whenever you like - nothing is lost.
The sections you don't have yet
The preview shows example products and posts so you can see how your site will look once you fill it in. They are examples only - nothing is saved to your shop.
«Make it yours» - if you started from zweihost.com
If you created your shop from zweihost.com/en/start, the code from the email signs you straight in here - into «Make it yours»: three short questions next to your live shop, each of them skippable.
If you already have a ZweiHost account with that email, the new shop is added to it, but the code does not sign you in by itself: you sign in with the email and password you already use and pick the new shop in the shop switcher. That way the code from the email never opens an account that already holds your other shops. If the account has no password of its own yet (an invitation you never accepted, for example), set one from the link in the email we sent you.
On the right is your real shop - you can browse products, add to the cart and get to the checkout. It is opened in a test session (the yellow strip at the top): every order from here is a test order - not a sale, not in the reports, Приложение 38 or the documents, and it cancels itself when the session ends. The session lasts 2 hours and renews itself while you are on this page - the preview stays on the page you are on, even in the middle of the checkout; if it does end, the preview takes no orders until it has loaded a new one, so a real order can never be placed from here. If a new session fails to load several times in a row, the preview says «The preview did not load» - reload the page. Every change you save shows in the preview a moment later - it reloads the page you are on.
Above the preview you switch between Desktop and Mobile - most of your customers will shop from a phone, so look at your shop that way too. In the mobile view you pick the phone width (360, 375, 390 or 430 px). «On your phone» shows a QR code - scan it and the shop opens on your phone in the same test session, so orders from there are test orders too. On the phone the session does not renew itself: once it ends, the shop there takes no orders and tells you to scan the code again. On a phone the preview is always the mobile one, and the arrow folds the question panel up. The X at the top left saves the current step and takes you to the dashboard, and «View my site» opens your real shop in a new tab - there is no test session there, and orders are real.
- What do you sell? - pick the kind of shop. We arrange the look and load six sample products for your kind of shop - with photos, categories and options (size for fashion, volume for cosmetics, pack size for food and so on) - plus a six-photo gallery on the home page. The samples have the slug
sample-and you later replace them with your own. Picking a different kind swaps the samples, but only while the shop has none of your own products - your own products are never deleted. Other loads a gift shop; it is also what a shop starts with before a kind is picked. A shop being moved from another platform skips this step - its catalogue arrives with the demo delivery. - Name, logo and colour - the name (prefilled), the logo, one of six looks (palette + fonts + style in one tap) and the primary colour (usually from the logo). Everything saves at once - the name when you leave the field, the logo as soon as you upload it. Under «Customise» are the same editors as the site editor's "Store" › "Theme". Once the theme is edited there (it has a draft or a publication), the looks, the colour and «Customise» give way to a button to the editor. Once the logo is edited in the Site editor (it holds a draft or a publication of the header), or you do not hold "Publish the site", this step and the logo step of the guided setup show a button to "Store" › "Header" instead of the logo fields.
- How do you deliver? - Econt, Speedy, pickup from the shop or «not sure yet». Pickup from the shop with an address is switched on in advance and cash on delivery works from the first minute - so the shop takes orders before you connect a courier.
At the end you see the «Place your first order» card. Press «Order in the preview» and order from your shop as a customer - in the preview on the right (on a phone the panel folds away and the preview is below). The checkout offers cash on delivery, pickup from the shop (if you gave an address in step 3) and test delivery with the couriers the platform has a test account for. Once the order goes through, the card becomes «We got order #…» with a «See the order in Orders» button, and the customer - that is, you - receives the confirmation email. The «After that» list is the same as the dashboard card, minus the first order and the plan: your first product, the courier you picked in step 3 (straight to its tab) and the domain - each row says what the shop gets from it, and done rows are struck through. If your shop has ZwAI, there is also a row to describe your product with it. Reaching this screen marks «Make it yours» as finished, so the reminder emails for an unfinished shop stop. Every choice saves immediately; you can come back any time through the guided setup.
If you are moving a shop from another platform
When you told us you already sell online, you do not get an empty shop: we prepare a demo with your look, and your catalogue arrives at delivery.
Whether we ask you for a file depends on your shop - we check it when you sign up, and the email you get on day one tells you which of the two applies:
- «We have your shop's address» - your catalogue can be read publicly (as it is for most Shopify and WooCommerce shops). You do nothing - we take the products ourselves.
- «We need one file» - your catalogue is not machine-readable, so we need a product export from your current platform. That is the case on CloudCart, for example, and on any shop whose firewall blocks us.
If you got the second email:
- Press «Send the file». The link signs you in and opens the upload page - no password needed.
- Choose the export (CSV, Excel, JSON or XML, up to 25 MB). If your format is not listed, reply to the email and we will find a way.
- The 3-5 working days start from the moment the file reaches us.
If you are not sure, or you would rather send us a file anyway, you can do it any time through the upload page. An extra export never hurts.
Your trial starts at delivery
While we are moving your shop, the 30 days are not running. The count starts on the day you receive your shop with your own products - not on the day you signed up. Until then, explore the demo at your leisure.
You can see where we are at any time on Home: the Migration card says whether we are still looking at your shop, waiting for a file from you, or already working on it. Until delivery there is no countdown on Home and no plan chooser under Billing & subscription - we will not ask you for a card before we have delivered. The products you see meanwhile are our samples and they go when yours arrive; the name, logo, colours and delivery you set up now stay.
Once we deliver the catalogue you get the «Your shop demo is ready» email, and from there everything works like any other shop.
What's left - the dashboard card
Your dashboard carries a "Finish setting up your shop" card. It tracks how far you have got by reading your real data - nothing is ticked off by hand, so what it shows is always true.
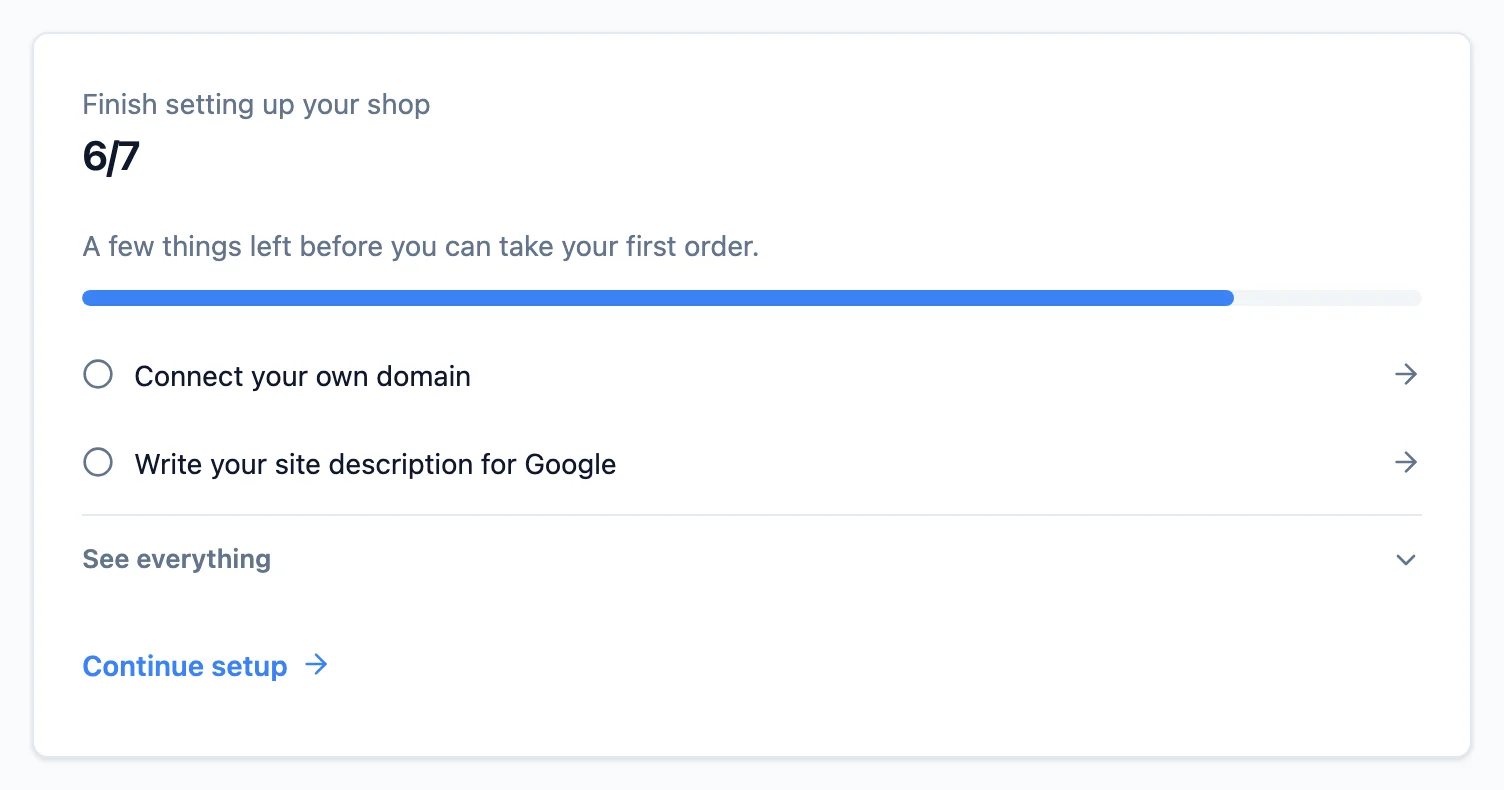
It splits the work in two:
- Required - without these your shop cannot take an order (contact details, company name and EIK, a category and a product, bank transfer details, delivery, your own domain).
- Optional - logo, colours, a hero image, SEO description, tracking.
Once every required step is done the card congratulates you and disappears. Optional steps never hold it at "unfinished".
If you are on a free trial, the card switches to a shorter form with five rows - first order, first product, courier, domain and choosing a plan (plus a sixth, «Describe your product with ZwAI», if your shop has ZwAI). Under each action it says what the shop gets from it, and each row takes you exactly where it is done: the courier is the one you picked in «How do you deliver?» (Econt or Speedy - straight to its tab; pickup only - the row becomes «Pickup from the shop»), and the domain row opens the Domain tab in settings. Below the card, a Free trial card appears with the days left, the date the trial ends and a Choose a plan button. The sample products your shop starts with do not count as your work. What happens on day 30, and how choosing a plan works, is in Billing & subscription.
What the BackOffice is
The BackOffice is your site's admin panel. You edit content, prices, images, and settings here, and your public site updates automatically. No coding required.
The menu on the left
The menu follows how you actually run a shop - sell, stock, serve, grow, measure:
- Orders - every order, returns, and refund requests.
- Products - your catalogue: products, categories, bundles and badges.
- Customers - customer data, GDPR requests, favourites and inquiries.
- Marketing - promotions, newsletter, tracking, Meta catalog and the campaign report.
- Reports - tables of orders and sales to analyse and export.
- Content - pages & sections, checkout notice, FAQ, blog, reviews.
- Online store - site editor (with the theme: colours, fonts, style), translations, legal pages, redirects.
- Import & export - move a whole site or catalogue.
- Settings - general settings, couriers, emails and billing.
Click a group heading to open or collapse it. Groups that don't apply to your plan or add-ons aren't shown at all.
Some menu pages carry a small numbered bubble - how many items there are waiting on you: new orders to process, returns awaiting approval or a refund, pending cancellation and refund requests, GDPR deletion requests, unread inquiries, reviews awaiting moderation, and products low on (or out of) stock. You don't have to rely on our email notifications - the moment you open the BackOffice you can see where work is waiting. The counters refresh on their own and disappear once the queue is empty.
The counters show only what is waiting on you - not everything unfinished:
- All orders shows exactly the same number as the To process tab. Once you register a waybill the order moves to *Awaiting pickup* (it now waits on the courier, not you) and drops off the counter.
- Returns counts the cases with an action button: *Requested* (approve or reject) and *Received* / *Inspected* (issue the refund or reject). While the parcel is still travelling back to you the return isn't counted - it's waiting on the customer and the courier.
Saving changes
Every screen with a Save button records your change the moment you click it - you'll see a short success message. Changes appear on the live site straight away.
If you have unsaved changes and try to leave - through a menu link, another tab, the browser's Back button, switching shops or signing out - we ask first. Save and continue stores your changes and takes you on; if the save fails, you stay on the page and can see what to fix. Continue without saving drops them, and Stay takes you back to the form. Where saving needs a separate confirmation from you (a lowered stock, say, or a change that affects your live domain), we only ask whether to stay or to continue without saving, so that we never confirm something on your behalf. Closing or reloading the browser tab shows the browser's own warning.
If a screen ever stops working because of an unexpected error, you'll see a Something went wrong card in its place, and the menu stays where it is. Try again reloads just that part of the screen and is safe - it doesn't repeat or undo anything you've already saved. If the error keeps coming back, click Reload page, and if you write to us about it, include the error code if the card shows one.
The top bar
A top bar sits above every screen, with the buttons you need everywhere:
- BG / EN - the BackOffice language. It only changes the admin's language - your site's own languages are managed in Online store → Translations.
- The moon (or sun) button - switches the BackOffice between the light and the dark theme.
- View site - opens your site in a new tab: on your own domain once it is connected, otherwise on its temporary address.
- Help - opens this Help Center. While you are in it, the button is highlighted.
On a phone the bar keeps the menu button on the left and Help on the right; the language, the theme and View site sit at the top of the menu.
On a computer, the arrow button next to the ZweiHost name collapses the menu into a narrow strip of icons, leaving more room to work. Click it again to expand the menu - the BackOffice remembers your choice.
Your browser's automatic translation (such as Google Translate in Chrome) is switched off for the BackOffice, because machine translation rewrites the page and can show outdated values or stop the admin from working. To work in another language, use the BG / EN buttons. This applies to the BackOffice only - your site stays open to automatic translation, so your customers can read it in their own language.
At the very bottom, under your name and role, sit the My profile link - your personal account settings (password change and two-factor authentication), reachable by every account - and Sign out.
Help everywhere
The ? button at the top of each screen opens help for that exact feature without leaving what you're doing. This Help Center collects every guide in one place.
The setup steps
The menu on the left is ordered for daily work - which is why it starts with Orders. This Help Center is ordered by something else: the order in which to set your shop up. The guides run top to bottom as nine phases, each building on the one before. Work through them in order and you won't have to double back.
- Getting started - find your way around, then fill in your site settings. Everything else inherits from them.
- Design your storefront - colours, fonts, the hero carousel, your menu and your languages.
- Build your catalogue - products, categories, variants, bundles and badges.
- Get ready to sell - delivery, email notifications and legal pages. The three things you need before a real order can go through.
- Content & trust - FAQ, blog, reviews and the AI assistant.
- Promote & grow - promotions, campaigns, newsletter and the Meta catalog.
- Run day to day - orders, returns, customers and inquiries.
- Measure results - reports, dashboard analytics and the campaign report.
- Account & data - subscription, invoices, import and export.
Lost?
You can always return to the Help Center with the Help button in the top bar, and the ? button on any screen opens the help for that exact screen.
Next step
Start with your site settings - the contact details, languages and logos every later page draws on. See Site settings.