This is the second step of setup, straight after the introduction. Do it before anything else: your legal pages, your emails, and the SEO descriptions on products and categories all inherit the details you fill in here.
The Settings screen is split into tabs so no single screen is cluttered:
- Main - contact details, data & privacy.
- Opening hours - the business's week, plus breaks and days off if you take bookings.
- Domain - connect your own domain, email sending and receiving.
- SEO & Ads - analytics & tracking, SEO & sharing, page SEO.
- Invoicing - your company details for invoices.
The logo, the favicon and the language switcher now live in the Site editor, in the "Store" › "Header" scope: the "Edit in the store" button at the top right opens it right there (see Site editor).
Password change and two-factor authentication are no longer a tab here - they live on the personal My profile page (the link sits at the bottom of the left menu, under your name), reachable by every account regardless of its permissions.
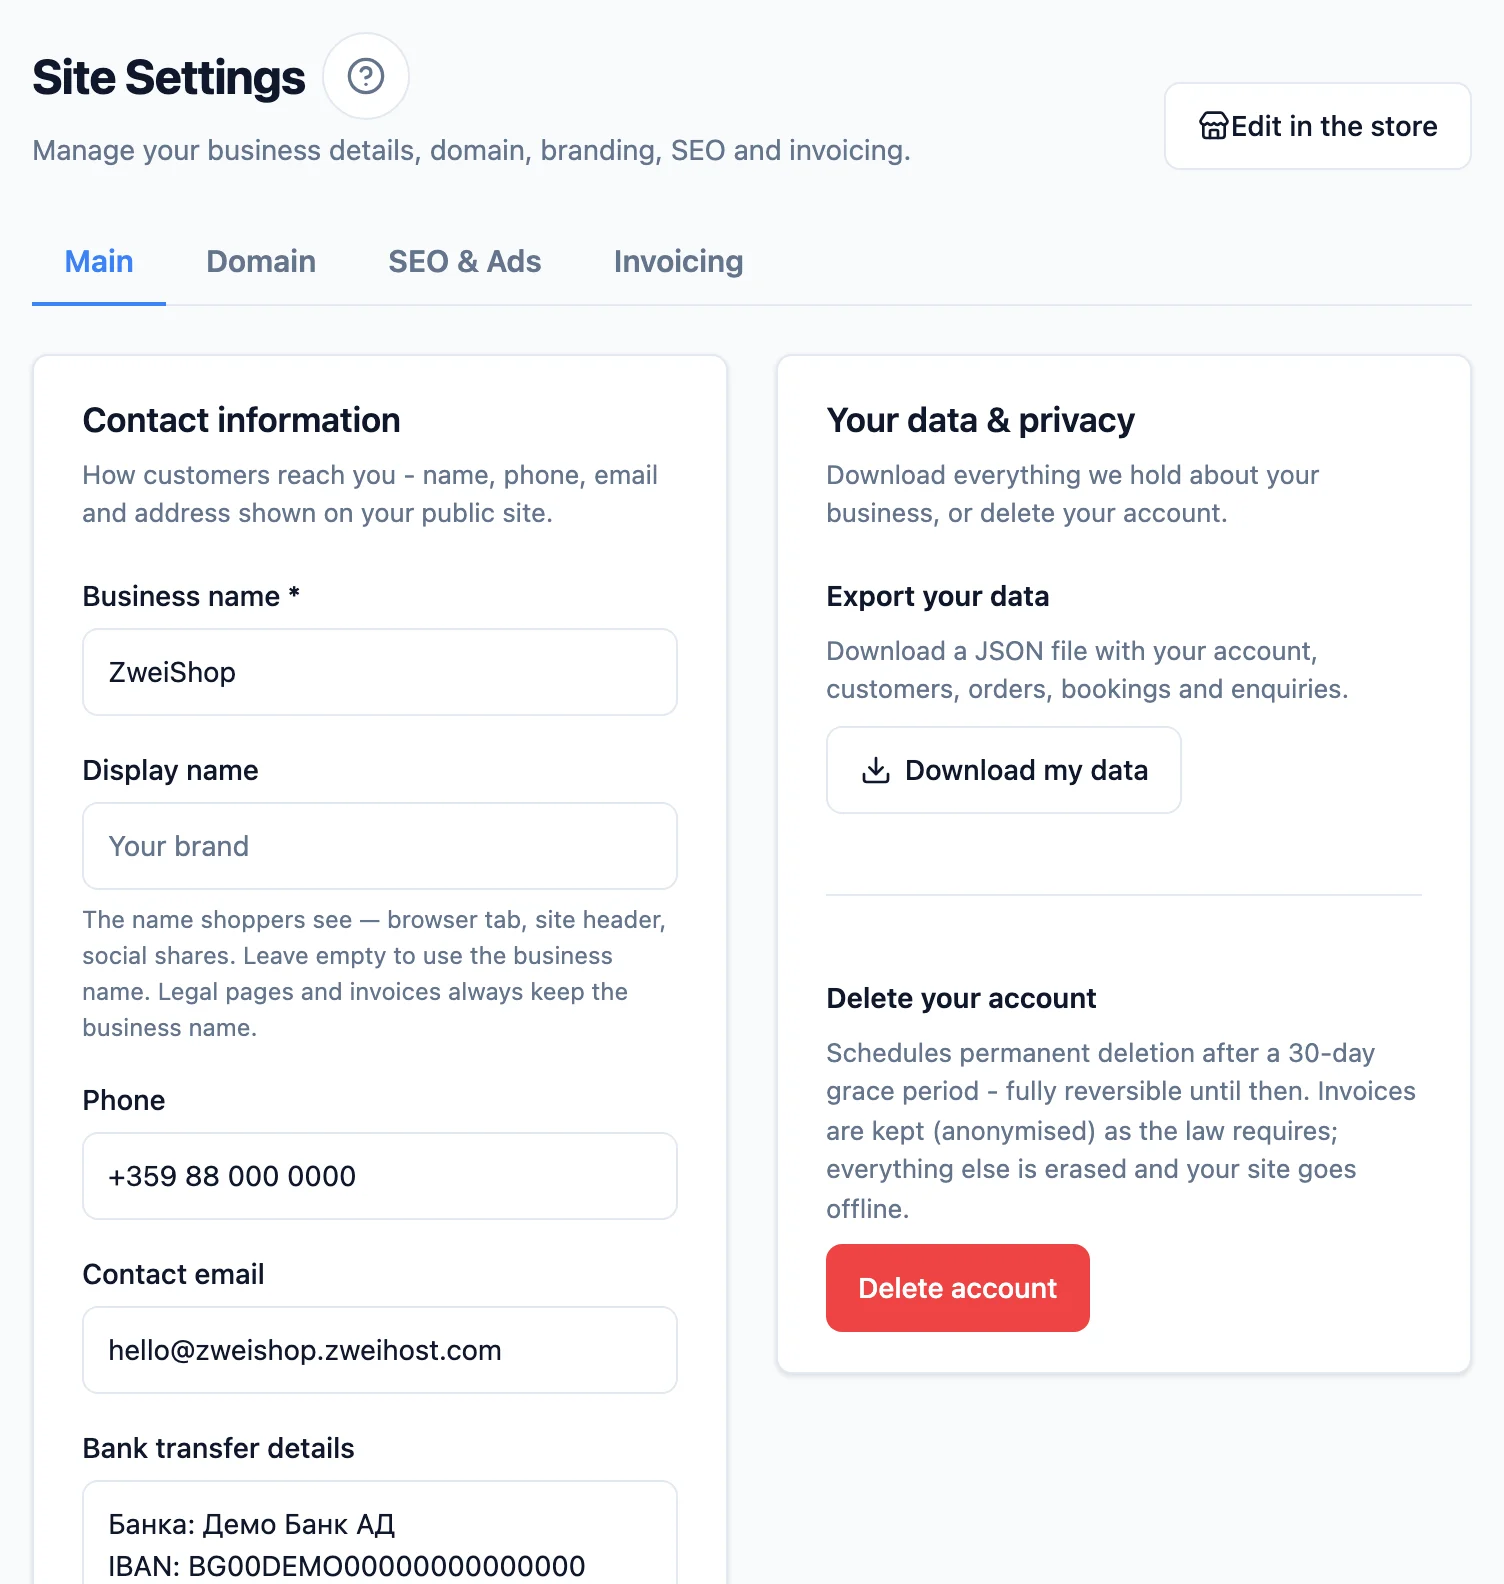
Contact details
- Set your business name, phone, and contact email - these appear on your public site.
- Display name - the short brand name customers see: the browser tab, your site header, and Facebook/Instagram shares. Leave it blank and your business name is used everywhere instead. Legal pages (Privacy, Terms, Imprint), invoices and payment records always keep the business name - so it's safe to put "MINIMAL" here while your company is "Минимал БГ ЕООД".
- The address is translatable: pick a language from the tabs and enter the address for each one.
- Show location on Google Maps - turn this on to embed a Google map of your address on the public Contact page. It only shows when an address is set.
- Show a call button on your storefront - turn this on to show a floating button in the bottom-right corner of every storefront page that dials your phone number when tapped. It only works when a phone is set above. The button label ("Call us") is editable per language in Online store › Translations.
- The same contact details (except the bank transfer details) can also be edited in the Site editor, in the "Store" › "Contacts" scope, live.
- Bank transfer details - free text with your IBAN and account holder. A customer who picks Bank transfer sees them at checkout, on the page right after the order, and on that order in their account (until it is delivered or cancelled), and the email confirming the order shows them at the top, right after the greeting - so does the Order received (awaiting confirmation) email if you confirm orders yourself. Bank transfer is offered at checkout only while this field is filled in, so leave it blank if you don't accept bank transfers.
Opening hours
The Opening hours tab sets the business's week - the hours your site shows (at the bottom of every page and on Contact) and, if you take bookings, the hours clients can book.
- Each day is one row: a switch (does the business work that day) and the from - to hours. A day you haven't changed is switched on with the default hours (Mon - Fri 10:00 - 18:00, Sat - Sun 10:00 - 16:00). Above the week, the "On your site:" line shows exactly how the site will read - consecutive days with the same hours are grouped ("Mon - Fri 10:00 - 19:00") and closed days read "Closed". Press Save.
- An online shop sees the week and the "Show the opening hours on my site" switch. If your site showed no hours until now, the switch is off - turn it on once you've set the hours.
- A salon that takes bookings always shows its hours and sees two more cards:
- Recurring breaks on working days - pick the days (for example Mon - Fri) and the break's hours and press Add. One rule covers every day you picked; clients cannot book during a break.
- Days off - tap a day, or the first and the last day of a period, and press Add days off. Days already off are struck through in the calendar and listed below as periods ("24 - 26 Dec"); the bin next to a period removes it. Nobody can be booked online on a day off.
Change password
- Change password - update your admin sign-in password (on the My profile page). The new password must be at least 10 characters - the same applies when you set a password from an email link. If your current password is shorter, it keeps working until you change it. Changing it signs you out on every device, this one included - sign in again with the new password.
Couriers
Couriers and delivery are no longer a tab here - they have their own page, Settings → Couriers, where you connect Econt, Speedy, Sameday, BOX NOW and Pigeon Express, set the sender address, parcel handover, free delivery per payment method, and delivery pricing (including your own rates by weight and region). See Shipping & couriers.
Invoicing
The Invoicing tab holds the seller details that go on every order invoice: legal entity, company number (ЕИК), company address, responsible person (МОЛ), and the VAT settings. When Registered under VAT is off (the common small-business case), invoices omit the VAT breakdown and carry the "not registered" note; when on, the total is split into a tax base + VAT at your rate.
Company address (for invoices). If your company's registered address differs from your store address, enter it here - it is printed as the seller address on invoices, summary invoices, goods notes and Приложение 18а documents. Leave it empty and documents keep using the store address from Contact details, as before. The change applies to documents issued after you save; documents already issued stay as they were.
Invoice start number. Invoices are numbered automatically, ascending, and without gaps, as the law requires. The first invoice gets the start number and each next one increments by 1. Set it if you're continuing an existing paper series. The number locks once your first invoice is issued, so already-issued invoices are never renumbered.
"I also issue invoices outside this online store."
If you also give out invoices elsewhere - a paper book in a physical shop, a cash register, or accounting software - turn this on. Otherwise the numbers collide: the store issues, say, 2000001032, you hand a walk-in customer 2000001033, and the next online order also grabs 2000001033 → a duplicate number, which the law forbids.
The fix is NAP-recognised: one company may split the 10-digit number into non-overlapping blocks, one per place invoices are issued. Give the online store a high block (e.g. from 2000000001 up) and let the in-store book run from the low numbers (e.g. from 0000001020) - the two can never meet, and each stays ascending and gap-free within itself. Optionally set an online range end - once reached, issuing stops so the block can't spill into another range (you can raise it later).
Goods notes (стокови разписки) and your accounting policy
The same switch also governs goods notes: if you issue notes outside the store too, give them their own start number and (optionally) a range end. They're a separate series from invoices (a goods note isn't a VAT invoice and has no legal gap-free rule - this is purely for tidy bookkeeping), so they get their own independent block.
Important: the split must be written into your accounting policy (a manager's order / заповед); confirm the exact ranges with your accountant.
Domain
The Domain tab is where you connect your own domain (e.g. your-shop.com) so your site runs on it instead of the staging address. The Connect your domain row on the dashboard card opens this tab directly. Pick how to connect, enter your domain, and click Connect - it all happens in one step:
If we are moving your shop to us, the domain card is locked until you go live. Until then your shop is a demo: orders and payments are simulated and courier labels are demo labels. If you pointed your domain here now, your customers would reach the demo instead of your real shop, which is still running on your old platform. Choose a plan and go live and the card unlocks straight away - moving your domain is the last step of going live. Until then, share your shop at its staging address (your-shop.zweihost.com).
Automatic (recommended). Point your domain's nameservers at us and we host the whole DNS zone - the records for both your website AND your email are set up automatically, with nothing to paste. Click Connect automatically, then replace your domain's existing nameservers with the two shown at your registrar. Once the delegation propagates, your website and email go live automatically. The status shows Waiting for your nameservers until it flips to Live.
Manual. Keep your current DNS provider and add the records yourself at your registrar:
- Add the shown DNS records at your registrar (where you bought the domain): one
CNAMEforwwwand a one-timeCNAMEfor the certificate. - Point your bare domain (without
www) at thewwwversion with a 301 redirect. This isn't a DNS record - set it in your registrar's "URL forwarding" (or "domain forwarding") settings. Your storefront runs on thewwwversion. - Once the records propagate, we issue the certificate and bring your domain live automatically (usually within a few minutes). You can also click Check resolution & go live to check the status.
Until then your site keeps running on its staging address. You can click Disconnect at any time - your site returns to the staging address, and the connection is torn down either way (including the automatic DNS if you used it), so the same domain can be reconnected right away (for example to a different site).
From Manual to Automatic. If you connected your domain Manually, you can switch to Automatic later without disconnecting: click Switch to Automatic, confirm, and set the two nameservers shown at your registrar. Your site keeps running on the www version throughout - the Manual records stay in effect until the delegation propagates, after which they are no longer needed (and your bare domain without www is served by us too, no redirect required).
Going live (inside the "Domain & email" panel)
The Domain & email panel at the top of the tab shows three status rows - hosting, email sending and email receiving - and, once you connect a domain, three go-live checks too: your certificate is issued, your storefront serves on the preview, and your old links (the 301 redirects) land on real pages, so the switch happens with no downtime and no lost Google ranking. While anything is still settling, the panel refreshes automatically every 30 seconds (with a small countdown and a loading spinner) and stops on its own once everything is ready - there's nothing to click. Any old link that points to a missing page is flagged so you can fix it first. Two tips for the switch itself: lower your domain's DNS TTL to 300 seconds about a day beforehand, and keep your old site online for a few days - your preview stays live for 7 days as a safety net so you can revert instantly if needed.
Email & domain security
Once you connect a domain, the Email & domain security card appears below the Domain & email panel. It shows how mail services around the world see your domain, in five rows:
- SPF - whether your domain has a record saying who may send mail on its behalf.
- DKIM - whether the signature on email from your domain is verified with Amazon SES.
- DMARC - what mail services do with a message that pretends to be from you but fails the checks, and whether reports about such messages are collected. No monitoring means a permissive policy (
p=none) with no reports, Monitoring only means reports are collected but the policy is still permissive, and Protected means the policy is in force (quarantineorreject). - DNSSEC - whether your domain's DNS zone is signed and the registry publishes the signature (a DS record). This protects your records from being forged.
- MTA-STS - encrypted transport for incoming mail. For now this row is informational only.
The five rows only show the state. If you connected your domain Automatically, we add a DMARC record when you connect that asks for reports to ZweiHost and stops no mail (p=none with rua), which is why the DMARC row shows Monitoring only (a domain connected earlier may still show No monitoring until its record is updated). The checks run automatically while the tab is open and a result is kept for up to 5 minutes, so a change at your DNS provider can show up with a short delay - the top right of the card says when the last check ran. If a check fails for a moment, the card says so ("We couldn't check the DNS records"), the rows show No data and we try again automatically - it does not mean anything is missing.
Protection against spoofed email (DMARC). Below the rows is a step-by-step panel that gradually strengthens your DMARC policy - every step is reversible in one click.
- Monitoring - reports are already being collected (see above). For an automatically connected domain this is done from the start.
- Quarantine - mail that pretends to be from you but fails the checks goes to spam. Available 14 days after monitoring is on (so the reports first show you who sends mail in your name).
- Reject - such mail is rejected outright. Available 30 days after quarantine.
If you connected your domain Automatically, each step is turned on with one click - we update the DMARC record for you. Before you turn on quarantine or reject, we show which services send mail from your domain and ask you to confirm with a checkbox, because if you send mail through another service (e.g. Gmail “send as”) that is not set up correctly, your own mail may disappear into spam. Stepping back to a weaker policy is always one click, with no waiting.
DNSSEC is also turned on with one click (for an automatically connected domain). We then show a single DS record that you add at your domain registrar - a step only you can do. The DNSSEC row turns Active once the registry publishes the signature. If you later move DNS provider, remove the DS record at the registrar first.
If you connected your domain Manually, the card changes nothing in your DNS - instead it shows the ready-made TXT records to copy: first for monitoring (under the DMARC row), then for quarantine and reject in the panel below. Add them at your DNS provider with the name _dmarc. DNSSEC on a manually connected domain is managed by your DNS provider - ask them to sign your zone. If you already have a policy in force (quarantine or reject), we don't offer a weaker record - yours stays as it is.
Email sending
As soon as you connect a website domain, an Email sending section appears in the Domain tab - this is where you choose where your emails are sent from:
- Send from ZweiHost (default). Your emails send from a shared, already-warmed ZweiHost domain - nothing to set up, and good deliverability from day one. Customers see your business name as the sender, and replies go to your contact email. Newsletters and promo emails work from this address too.
- Your own domain. Emails send from your domain (
no-reply@yourdomain.bg, newsletters fromnews@yourdomain.bg), with reputation isolated per shop (Amazon SES). If you connected your domain Automatically, we add the required DNS records (DKIM/SPF) for you - nothing to paste. If you connected it Manually, we show the records to add at your registrar (the Host / Name field is ready for most registrars; for Cloudflare/Route 53 use Full name), then click Re-check. A brand-new email domain may land in spam at first while it "warms up" (usually a few weeks).
Changes apply only after you click Save and confirm in the dialog - so an accidental click never triggers DNS changes. The section appears as soon as you connect a domain; you send from ZweiHost by default until you pick and confirm your own domain (which requires a verified website domain).
Receiving email (forwarding)
If you connected your domain Automatically, you also get business email forwarding: mail sent to info@yourdomain.bg (and to every other address on the domain) is forwarded, free, to an inbox you choose - no mailbox to maintain on the domain. We set it up automatically when you connect:
- In the Forward to (your inbox) field, enter an inbox you can open (e.g. a Gmail). This is the destination, and it is separate from your public contact email - so
info@yourdomain.bgcan stay the address customers see and you reply from, while the mail lands in your real inbox. The destination cannot be an address on the domain itself (info@yourdomain.bg→info@yourdomain.bgis a loop Cloudflare refuses) - so if your contact email is on the domain, enter an external inbox here. Leave the field blank to forward to your contact email instead. - Cloudflare sends a confirmation email to that inbox. Click the link in it - forwarding does not start without this confirmation (the panel shows Confirm by email and a Resend confirmation email button).
- After the click the status becomes Forwarding - from that moment anything sent to an address on your domain lands in the inbox you chose.
Changing the destination later requires a fresh confirmation (Cloudflare emails the new inbox again).
Two important notes:
- If your domain already has an email service (its own MX records - e.g. mailboxes at an old host, or Google Workspace), we touch nothing: your current mail keeps working and the card shows Your own provider. Two buttons sit here. Check again re-reads the records and is safe - if the old service has since been removed, forwarding is set up straight away; if it is still there, nothing changes. Switch to forwarding instead replaces that old service with forwarding - use it only if no real mailboxes run on the domain, because they would stop receiving mail.
- Forwarding is receive-only. When you reply, the message goes out from your own inbox - exactly like before. Your shop's outgoing email (order confirmations, newsletters) is sent separately, per the Email sending section above.
- If the setup doesn't complete, the card shows it with a "Try again" button. Either way one click re-runs the setup, followed by the same email confirmation.
SEO & social sharing
- Meta description - a short text (up to 160 characters) shown in Google results and when links are shared.
- Social share image - a wide picture (1200×630 works best) shown when a link to your site is shared on Facebook, WhatsApp, LinkedIn or X. Leave blank to fall back to your hero image, then your logo.
- Per page (automatic): every product, blog post and category gets its own title, description, and image in Google and in shared links - taken from the content itself (or hand-set in its editor). The fields here are the site-wide defaults.
- Page SEO - a separate card below, where you hand-tune the title, description, and share image of the fixed pages (Home, Products, Contact, FAQ, Blog, Portfolio, Services, Bundles) - per language. A blank field uses the page's automatic title, then the settings above. Each page also has a Focus keyword + Additional keywords with a live SEO analysis (green/amber/red) - a writing aid that is not shown on your site.
Analytics & tracking
- Google Analytics ID (GA4) and Google Tag Manager ID - public IDs we inject into your site. They load with Google Consent Mode and only measure after a visitor accepts cookies. If you load Analytics through Tag Manager, leave the GA4 field blank to avoid counting visits twice.
Don't fill in both
Filling in GA4 and loading Analytics through Tag Manager counts every visit twice, which quietly inflates every report you read afterwards.
- Event tracking (Google): we emit the standard GA4 events -
page_viewon every navigation; the full ecommerce funnel - browsing (view_item_list,select_item,view_item,view_promotion,select_promotion,search), cart (add_to_cart,add_to_wishlist,remove_from_cart,view_cart) and checkout (begin_checkout,add_shipping_info,add_payment_info,purchase- the last with the order number, value in the real currency and the items); customer accounts (sign_up,login); andgenerate_leadon a contact-form enquiry. Easiest: just enter your GA4 Measurement ID (G-…) above - we send all of these straight to GA4, with no Tag Manager setup at all. Prefer Tag Manager (e.g. you already use it for other tags)? The same events are in the dataLayer for you to bind your tags to. For signed-in shoppers we also attach a stable id (user_id) to these browser events - the same one we send server-side - so GA4 can join one customer's visits across devices; guests get none. - Server-side tracking (Measurement Protocol) (Pro and up): besides the browser, we send your orders to GA4 directly from our server too, so no conversion is lost when a browser is blocked or on iOS. It is deduplicated with the browser event by the order number (GA4 merges them) and respects cookie consent. When you cancel an order, we also send a server-side
refundwith the same order number, so GA4 reverses that conversion. For signed-in shoppers we also attach a stable customer id (user_id), so GA4 can join one customer's visits across devices; guest orders send none. When a shopper has granted advertising consent, these server-side events also carry the shopper's SHA-256-hashed email and phone (hashes only - Google never receives the raw values), so Google can match the conversion to your ads more accurately (Enhanced Conversions); without advertising consent, these are not sent. Paste an API secret from GA4 → Admin → Data Streams → Measurement Protocol API secrets. Send test event checks the connection instantly, and Test tracking opens your storefront in GA4 DebugView. Solo shops use browser GA4 only. - The Meta Pixel and Conversions API fields live in a separate panel (Meta), if you advertise on Facebook/Instagram. Beyond orders (Purchase), we also send server-side conversions for a contact-form enquiry (Lead) and a booking (Schedule) - the actions that matter for service businesses. Each conversion is sent once from the browser and once from the server with a shared id, so Meta merges them and never double-counts.
- Business country - pick your country. It's sent (hashed, i.e. obscured) with the server-side events (orders, bookings and enquiries) so Meta can match your customers to ad audiences more accurately. Optional - leave it on "Not set" if you don't advertise.
- Google Search Console & Bing Webmaster verification - optional domain-ownership codes from Google's and Bing's search tools. We render them as meta tags on your site so the search engines can confirm you own the domain. Find them in Google Search Console (the "HTML tag" method) and Bing Webmaster Tools (Verify ownership → HTML Meta Tag) - copy only the
contentvalue. This verifies a URL-prefix property (e.g.https://yourdomain.com) - enough for most shops. - Domain verification code (Meta) - optional, if you advertise on Facebook/Instagram: the code from Meta Business Settings → Brand Safety → Domains. We render it as a meta tag on your site so Meta can confirm the domain is yours - required for some ad features.
- Google Search Console - domain property (DNS TXT) - optional, if you want a Domain property (covers every subdomain at once). It's a separate field because it uses a DNS record, not a meta tag. In Search Console pick a Domain property → the DNS TXT method → copy the whole value shown (it starts with
google-site-verification=) and paste it here. If you connected your domain Automatically (we host your DNS zone), we add the TXT record for you when you save; if you're on Manual DNS, we show the exact record to add at your registrar.
Don't use the "verify via Cloudflare" button
In Search Console's Domain method, Google offers a button to verify automatically through Cloudflare. It will never work for you - your DNS zone lives in our Cloudflare account, not yours, so Cloudflare refuses with "You are not authorized to make changes." Use the HTML tag method (the field above) or the DNS TXT method (this field) - those always work.
How to prove ownership in Google Search Console
There are two ways. The quick one (Option A) is enough for most shops; the second (Option B) covers every subdomain at once.
Option A - URL prefix (quickest, no DNS):
- In Search Console, click Add property → URL prefix and enter
https://yourdomain.com. - Choose the HTML tag verification method.
- Copy only the
content="…"value from the tag shown. - Here in the BackOffice: Settings → SEO → Google Search Console verification - paste it and click Save.
- Publish your site, then go back to Search Console and click Verify.
Option B - Domain property (all subdomains, via DNS):
- In Search Console, click Add property → Domain and enter
yourdomain.com. - Google shows a TXT record starting with
google-site-verification=. Copy the whole value. - Here in the BackOffice: Settings → SEO → Google Search Console - domain property (DNS TXT) - paste it and click Save.
- On automatic DNS → we add the record to your zone right away, nothing else to do.
- On manual DNS → we show the exact record to add at your registrar.
- Back in Search Console, click Verify.
Which method should I pick?
Most shops just need Option A. Reach for Option B only if you want one property to cover every subdomain (e.g. www, blog, shop).
Your data & privacy
- Download my data - exports a JSON file with everything we hold about your business (account, customers, orders, bookings, enquiries).
- Delete account - schedules permanent deletion after a 30-day grace period (reversible until then - you can cancel). After that your data is anonymised and your site goes offline; invoices are kept anonymised as the law requires. When a customer erases their own data, you get an email notice and their invoices are kept intact for your accounting.
Inventory
Low-stock alerts are configured under Products → Inventory (not under Settings).
- Low-stock threshold - a product (or variant) with this many units or fewer, but at least one, counts as "low" (8 by default). It drives the low-stock card on your dashboard, the daily email, and what shoppers see in your shop: the "Only N left" line and the "Low (N)" mark on sizes and variants. Details in Variants & stock.
- Daily low-stock email - when on, once a day we email your contact address a list of products running low so you can restock in time.
Shoppers can also ask to be told when a sold-out item is back: on a sold-out product they see "Notify me when available", and we email them once when you restock it.
Two-factor authentication
Two-factor authentication lives on the My profile page (alongside the password change) and adds a second step at login so your account stays safe even if someone learns your password.
- Turn it on - click "Enable two-factor", scan the QR code with an authenticator app (Google Authenticator, 1Password, Authy…), and enter the 6-digit code to confirm.
- Recovery codes - once it's on you'll see 10 one-time codes. Save them somewhere safe - they get you in if you lose your phone. They're shown only once; you can regenerate a new set anytime.
- At login - after your password you type the 6-digit code from the app into the six boxes (pasting it in one go works too). If you cannot reach the app, click "Use a recovery code instead" and enter one of your saved codes. A wrong code shows a message and you can try again.
- Turning it off - asks for your current password and a code.
For a shop's owners, administrators and members two-factor is optional. It is mandatory only for the administrator accounts of the ZweiHost platform itself: they can't turn it off, and until they turn it on they sign in as an ordinary user, without the administrator tools. Once it is on, they sign in again with a code from the app and the tools unlock.
Sign-in security
- Sign-out when idle - if you open no admin page for 24 hours, you are signed out automatically and enter your password again at the next sign-in. While you work, the session renews itself. An open tab that refreshes its own data (for example the Domain & email panel) also counts as activity.
- 7 days at most - 7 days after you sign in, you are signed out automatically, even if you work every day.
- Protection against password guessing - after several wrong sign-in attempts (a wrong password or a wrong two-factor code), sign-in for that email, or from that address, pauses for up to 15 minutes. During that time even the correct password does not get in - nor does a new one from Forgot password - so just wait.
Where everything else lives
- The hero section (the big images at the top) is managed entirely in the Site editor.
- The logo, favicon, header and language switcher live in the Site editor (the "Store" › "Header" scope).
- Email notifications (templates, design, automated codes) have their own page, Settings → Emails - see Email notifications.
- Fiscal receipts and the alternative regime live at Settings → Fiscal receipts - see Fiscal receipts & the alternative regime.
- Couriers and delivery live at Settings → Couriers - see Shipping & couriers.
Next step
The foundation is in place. Now make the site look like your brand - colours, fonts and style. See Site editor, "Store" › "Theme".